As part of the Udacity’s Self-Driving Car Nanodegree, I had the opportunity to try a GPU-powered server for Traffic Sign Classifier and the Behavioral Cloning projects in Term 1. It was not a painful experience(as I was expecting) to use this hardware because Udacity provided an AIM with the necessary software already installed, and I didn’t need to install anything else. The only problem I encounter was to update the NVIDIA driver, and it was done easy. During that process, I read a bit about GPUs, CUDA and cuDNN. It was awesome to see this development and the application of these platforms to Deep Learning. My Mac had a NVIDIA video card; so, I was up for local adventures too!
To use GPU-powered TensorFlow on your Mac, there are multiple system requirements and libraries to install. Here are a summary of those system requirements and steps:
- CUDA Toolkit 8.0
- NVIDIA driver associated with CUDA Toolkit 8.0
- cuDNN v5.1
- GPU card with CUDA Compute Capabilities 3.0 or higher. (Compute Capabilities version identify the features supported my the GPU.)
When all of that is installed and checked, TensoFlow with GPU support could be installed. I don’t know about you, but this is a long list to me. Nevertheless, I could see great improvements on performance by using GPUs in my experiments. It worth trying to have it done locally if you have the hardware already. This article will describe the process of setting up CUDA and TensorFlow with GPU support on a Conda environment. It doesn’t mean this is the only way to do it, but I just want to let it rest somewhere I could find it if I needed in the future, and also share it to help anybody else with the same objective. And the journey begins!
Check you have a CUDA GPU card with CUDA Compute Capability 3.0 or higher.
First, you need to know your video card. Go to “About This Mac,” and get from there:
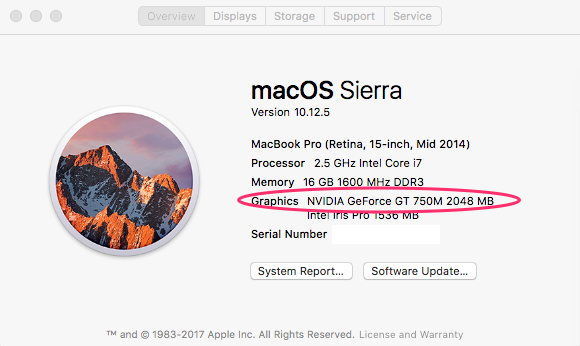
In my case, it is NVIDIA GeForce GT 750M. Then you need to see if the card is supported by CUDA by finding you card here:

Now you have hardware support confirmed, let us move forward and install the driver.
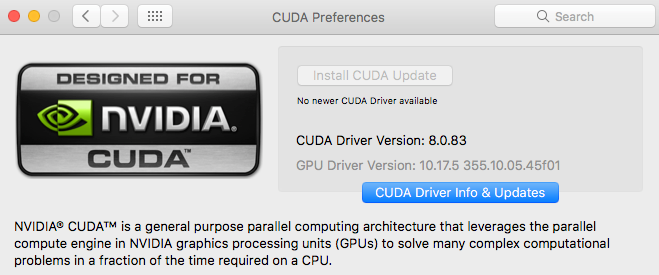
Install the CUDA Driver.
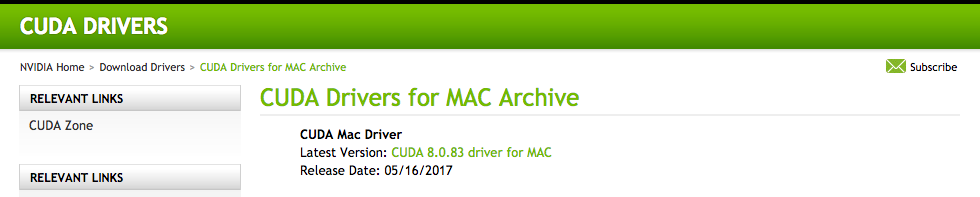
There are options to install the driver when you install the CUDA Toolkit 8.0, but I preferred to install the driver first, to make sure I have the latest version. Go to this URL and download the latest version. At this time, it is 8.0.83:
Install CUDA Toolkit 8.0
You can find the installation steps for Mac OS X here. There are some system requirements:
- a CUDA-capable GPU(you make sure you have it in the previous sections.)
- Mac OS X 10.11 or later (In my case, I have v10.12.5)
- the Clang compiler and toolchain installed using Xcode.
- the NVIDIA CUDA Toolkit.
The first two requirements are met at this point; lets get to the last two.
Install Xcode and native command line tools
I didn’t have to install Xcode because I have it installed already, but here is a tutorial on how to do it. The tutorial also cover the installation of the command-line tools. In my case, I just need to install them with xcode-select --install. It is always good to verify that you installed it by using /usr/bin/cc --version. You should see something similar to this:
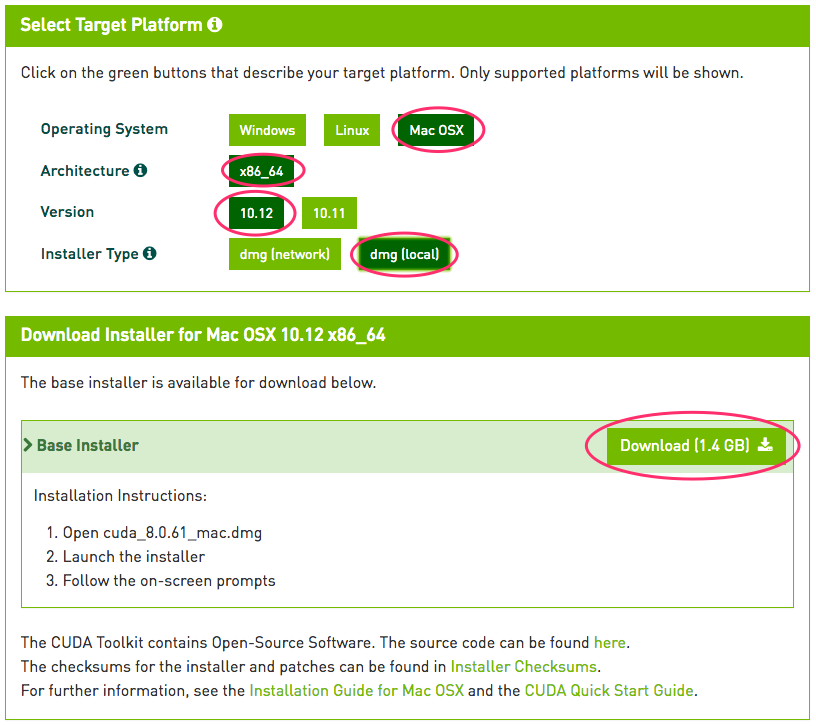
Download CUDA Toolkit install
Go to this URL to download the toolkit for the appropriate OS, architecture, and version:
Optionally, verify the download was correct with md5 checksum: openssl md5 <THE_FILE_YOU_DOWNLOAD>.
Double-click the file, and follow the installation wizard. On the package selection, un-check the CUDA Drivers because they were installed before. When the installation finished, add the following to your .bash_profile:
It is always good to verify the driver is running:
- Open a new Terminal.
- Check the driver is correctly installed by checking the CUDA kernel extension (/System/Library/Extensions/CUDA.kext) with the command:
kextstat | grep -i cuda.
You should see something similar to this:
Compile samples
Now everything CUDA related should be installed correctly, but we can have some fun compiling and running CUDA samples to verify even more everything is indeed installed properly:
- Open a new Terminal.
- Move to where the samples are:
cd /Developer/NVIDIA/CUDA-8.0/samples/ - Try to make one of them:
make -C 0_Simple/vectorAdd
And the following error happens!!!
After google-ing it, this is an issue described here. Following the steps suggested by mlloreda, downgrading to CLT 8.2 should work:
- Log in to https://developer.apple.com/downloads/ (the version here is always the latest, we want a previous version)
- Go here https://developer.apple.com/download/more/ and find “Command Line Tools (macOS 10.12) for Xcode 8.2)
- Install CLT
- Run sudo xcode-select –switch /Library/Developer/CommandLineTools
- Verify that clang has been downgraded via clang –version
Done all that, The ‘80100’ error is gone, but a new error arrived:
It turns out where the samples, there is no write permission to them. You need to make a writable copy of the samples:
cd /Developer/NVIDIA/CUDA-8.0/binsh ./cuda-install-samples-8.0.sh ~/Documents/Projects/(this is a script that is part of the installation just to do the sample copy. I was not the first person with this problem I guess.)cd ~/Documents/Projects/NVIDIA_CUDA-8.0_Samplesmake -C 0_Simple/vectorAdd
And this time, it works!!!
Now that we are at it, why not to compile a few more:
make -C 0_Simple/vectorAddDrvmake -C 1_Utilities/deviceQuery
Lets run deviceQuery and see what happens:
All good so far. Let us go and compile all the samples with make. This takes a while to finish. There are a lot of samples there. Very interesting stuff. I just ran one more: bandwidthTest
It is good to play with this, but we need to keep going to get to the TensorFlow part. CUDA is done, next cuDNN.
Install cuDNN v5.1
To download cuDNN, you need to create a developer account here, and then proceed to the download part:
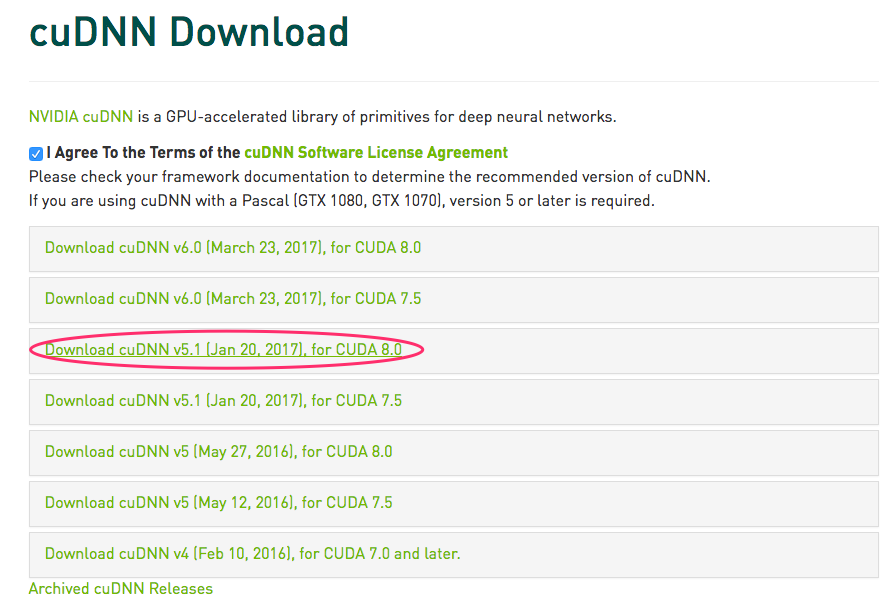
I created a directory ~/cudnn and untar the download files there. After that is done, add the following to your .bash_profile:
This was an easy step!
Creating a Conda environment and installing TensorFlow
Even when the Anaconda is not officially supported, the installation worked quite well:
- Create a new environment:
conda create --name=IntroToTensorFlowGPU python=3 anaconda - Activate it:
source activate IntroToTensorFlowGPU - Install TensorFlow:
pip install --ignore-installed --upgrade https://storage.googleapis.com/tensorflow/mac/gpu/tensorflow_gpu-1.1.0-py3-none-any.whl
Everything is set. Lest verify the installation running the TensorFlow code suggested on the Validate your installation:
Great! Everything looks like is working. It was a long journey, but it was fun! There are a lot of things to learn and a lot of different weird messages on this scripts. It is just the beginning. There is an Udacity free course looking good: Intro to Parallel Programming. It could be interesting to see the difference between this “lower” level compared to other platforms based on CPUs. I certainly like more chickens than oxes(reference to the course trailer video)!
Enjoy!