Sometimes you have computers at home you are not using. Those computers could be old, and not so powerful, but most of us have a couple of them collecting dust. It could be a good idea to configure them into a cluster. Why not? They are doing nothing, and it is not so complicated. Later on, they can be used more efficiently to schedule some jobs and serve any local project you can have. That is the starting point of this post: how you can have your very own Kubernetes cluster on your old hardware.

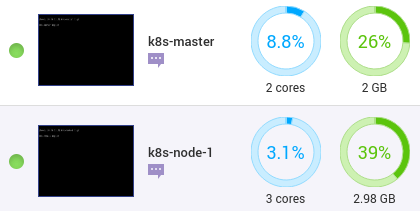
I have an old QNAP NAS with Virtual Station. At some point, I used it to store the family pictures, and now… the cloud offerings are so good I don’t use it anymore. This is an excellent candidate for hosting the first two nodes.
Kubernetes installation steps
The following are the steps I took to install and configure the cluster.
Step 1. Creating virtual machines.
Using Virtual Station UI, I created two virtual machines and installed Ubuntu 18.04.02 Server on them.
After the installation, I reserved their IPs on my router to make sure they will continue to have the same IPs after restart.
- k8s-master - xxx.xxx.xxx.23
- k8s-node-1 - xxx.xxx.xxx.28
Note: A nice Virtual Station feature is the snapshots. I took snapshots of the machines after every mayor installation just in case I mess it up. Of course… it never happens…
Step 2. Find good reference articles
As usual, it is good to stand on giant shoulders: you google it. I found this the post Install and Configure Kubernetes (k8s) 1.13 on Ubuntu 18.04 LTS / Ubuntu 18.10 with very detailed description on how to do this. In addition to that post, I found this Kubernetes on (vanilla) Raspbian Lite repo very informative. Especially when I am thinking of adding Raspberry Pi nodes, later on, those articles gave me the guidance I needed to start the installation.
Step 3. Setting hostnames
On each machine, set the hostnames with the following commands:
On k8s-master:
$ sudo hostnamectl set-hostname "k8s-master"
$ exec bash
On k8s-node-1:
$ sudo hostnamectl set-hostname "k8s-node-1"
$ exec bash
Then add the hostnames and IP addresses to each machine /etc/hosts.
Step 4. Installing docker service
On both machines:
$ sudo apt-get install docker.io -y
Reading package lists... Done
Building dependency tree
Reading state information... Done
The following additional packages will be installed:
  bridge-utils cgroupfs-mount libltdl7 pigz ubuntu-fan
Suggested packages:
  ifupdown aufs-tools debootstrap docker-doc rinse zfs-fuse | zfsutils
The following NEW packages will be installed:
  bridge-utils cgroupfs-mount docker.io libltdl7 pigz ubuntu-fan
0 upgraded, 6 newly installed, 0 to remove and 56 not upgraded.
Need to get 46.6 MB of archives.
After this operation, 235 MB of additional disk space will be used.
Get:1 http://archive.ubuntu.com/ubuntu bionic/universe amd64 pigz amd64 2.4-1 [57.4 kB]
Get:2 http://archive.ubuntu.com/ubuntu bionic/main amd64 bridge-utils amd64 1.5-15ubuntu1 [30.1 kB]
Get:3 http://archive.ubuntu.com/ubuntu bionic/universe amd64 cgroupfs-mount all 1.4 [6320 B]
Get:4 http://archive.ubuntu.com/ubuntu bionic/main amd64 libltdl7 amd64 2.4.6-2 [38.8 kB]
Get:5 http://archive.ubuntu.com/ubuntu bionic-updates/universe amd64 docker.io amd64 18.09.2-0ubuntu1~18.04.1 [46.4 MB]
Get:6 http://archive.ubuntu.com/ubuntu bionic/main amd64 ubuntu-fan all 0.12.10 [34.7 kB]
Fetched 46.6 MB in 10s (4740 kB/s)
Preconfiguring packages ...
Selecting previously unselected package pigz.
(Reading database ... 66710 files and directories currently installed.)
Preparing to unpack .../0-pigz_2.4-1_amd64.deb ...
Unpacking pigz (2.4-1) ...
Selecting previously unselected package bridge-utils.
Preparing to unpack .../1-bridge-utils_1.5-15ubuntu1_amd64.deb ...
Unpacking bridge-utils (1.5-15ubuntu1) ...
Selecting previously unselected package cgroupfs-mount.
Preparing to unpack .../2-cgroupfs-mount_1.4_all.deb ...
Unpacking cgroupfs-mount (1.4) ...
Selecting previously unselected package libltdl7:amd64.
Preparing to unpack .../3-libltdl7_2.4.6-2_amd64.deb ...
Unpacking libltdl7:amd64 (2.4.6-2) ...
Selecting previously unselected package docker.io.
Preparing to unpack .../4-docker.io_18.09.2-0ubuntu1~18.04.1_amd64.deb ...
Unpacking docker.io (18.09.2-0ubuntu1~18.04.1) ...
Selecting previously unselected package ubuntu-fan.
Preparing to unpack .../5-ubuntu-fan_0.12.10_all.deb ...
Unpacking ubuntu-fan (0.12.10) ...
Processing triggers for ureadahead (0.100.0-20) ...
Setting up cgroupfs-mount (1.4) ...
Setting up bridge-utils (1.5-15ubuntu1) ...
Processing triggers for libc-bin (2.27-3ubuntu1) ...
Setting up ubuntu-fan (0.12.10) ...
Created symlink /etc/systemd/system/multi-user.target.wants/ubuntu-fan.service → /lib/systemd/system/ubuntu-fan.service.
Processing triggers for systemd (237-3ubuntu10.12) ...
Setting up libltdl7:amd64 (2.4.6-2) ...
Processing triggers for man-db (2.8.3-2ubuntu0.1) ...
Setting up pigz (2.4-1) ...
Setting up docker.io (18.09.2-0ubuntu1~18.04.1) ...
Adding group `docker' (GID 113) ...
Done.
Created symlink /etc/systemd/system/sockets.target.wants/docker.socket → /lib/systemd/system/docker.socket.
Processing triggers for ureadahead (0.100.0-20) ...
Processing triggers for libc-bin (2.27-3ubuntu1) ...
Processing triggers for systemd (237-3ubuntu10.12) ...
Following the Docker post-installation instructions, add the current user to the docker group in case you want to run docker commands without sudo. On both machines: sudo usermod -aG docker $USER
Start and enable docker services on both machines:
$ sudo systemctl start docker
$ sudo systemctl enable docker
Synchronizing state of docker.service with SysV service script with /lib/systemd/systemd-sysv-install.
Executing: /lib/systemd/systemd-sysv-install enable docker
$  docker --version
Docker version 18.09.2, build 6247962
Step 5. Configure and install Kubernetes packages and repo
These step needs to be done for both machines as well:
Install packages first
$ sudo apt-get install apt-transport-https curl -y
Reading package lists... Done
Building dependency tree
Reading state information... Done
curl is already the newest version (7.58.0-2ubuntu3.6).
The following NEW packages will be installed:
  apt-transport-https
0 upgraded, 1 newly installed, 0 to remove and 56 not upgraded.
Need to get 1692 B of archives.
After this operation, 153 kB of additional disk space will be used.
Get:1 http://archive.ubuntu.com/ubuntu bionic-updates/universe amd64 apt-transport-https all 1.6.10 [1692 B]
Fetched 1692 B in 0s (7524 B/s)
Selecting previously unselected package apt-transport-https.
(Reading database ... 66996 files and directories currently installed.)
Preparing to unpack .../apt-transport-https_1.6.10_all.deb ...
Unpacking apt-transport-https (1.6.10) ...
Setting up apt-transport-https (1.6.10) ...
Kubernetes repo key
$ curl -s https://packages.cloud.google.com/apt/doc/apt-key.gpg | sudo apt-key add
OK
Kubernetes package repo
$ sudo apt-add-repository "deb http://apt.kubernetes.io/ kubernetes-xenial main"
Hit:1 http://archive.ubuntu.com/ubuntu bionic InRelease
Hit:2 http://archive.ubuntu.com/ubuntu bionic-updates InRelease
Hit:3 http://archive.ubuntu.com/ubuntu bionic-backports InRelease
Hit:5 http://archive.ubuntu.com/ubuntu bionic-security InRelease
Get:4 https://packages.cloud.google.com/apt kubernetes-xenial InRelease [8993 B]
Get:6 https://packages.cloud.google.com/apt kubernetes-xenial/main amd64 Packages [25.0 kB]
Fetched 34.0 kB in 2s (18.1 kB/s)
Reading package lists... Done
Note: It said “xenial,” but it should be ok.
Step 6. Disable swap
On both machines:
$ sudo swapoff -a
$ sudo nano /etc/fstab
(and comment the /sawp line with #)
Step 7. Install kubeadm
On both machines:
$ sudo apt-get install kubeadm -y
Reading package lists... Done
Building dependency tree
Reading state information... Done
The following additional packages will be installed:
  conntrack cri-tools kubectl kubelet kubernetes-cni socat
The following NEW packages will be installed:
  conntrack cri-tools kubeadm kubectl kubelet kubernetes-cni socat
0 upgraded, 7 newly installed, 0 to remove and 56 not upgraded.
Need to get 50.6 MB of archives.
After this operation, 290 MB of additional disk space will be used.
Get:6 http://archive.ubuntu.com/ubuntu bionic/main amd64 conntrack amd64 1:1.4.4+snapshot20161117-6ubuntu2 [30.6 kB]
Get:1 https://packages.cloud.google.com/apt kubernetes-xenial/main amd64 cri-tools amd64 1.12.0-00 [5343 kB]
Get:7 http://archive.ubuntu.com/ubuntu bionic/main amd64 socat amd64 1.7.3.2-2ubuntu2 [342 kB]
Get:2 https://packages.cloud.google.com/apt kubernetes-xenial/main amd64 kubernetes-cni amd64 0.7.5-00 [6473 kB]
Get:3 https://packages.cloud.google.com/apt kubernetes-xenial/main amd64 kubelet amd64 1.14.0-00 [21.5 MB]
Get:4 https://packages.cloud.google.com/apt kubernetes-xenial/main amd64 kubectl amd64 1.14.0-00 [8801 kB]
Get:5 https://packages.cloud.google.com/apt kubernetes-xenial/main amd64 kubeadm amd64 1.14.0-00 [8147 kB]
Fetched 50.6 MB in 18s (2855 kB/s)
Selecting previously unselected package conntrack.
(Reading database ... 67000 files and directories currently installed.)
Preparing to unpack .../0-conntrack_1%3a1.4.4+snapshot20161117-6ubuntu2_amd64.deb ...
Unpacking conntrack (1:1.4.4+snapshot20161117-6ubuntu2) ...
Selecting previously unselected package cri-tools.
Preparing to unpack .../1-cri-tools_1.12.0-00_amd64.deb ...
Unpacking cri-tools (1.12.0-00) ...
Selecting previously unselected package kubernetes-cni.
Preparing to unpack .../2-kubernetes-cni_0.7.5-00_amd64.deb ...
Unpacking kubernetes-cni (0.7.5-00) ...
Selecting previously unselected package socat.
Preparing to unpack .../3-socat_1.7.3.2-2ubuntu2_amd64.deb ...
Unpacking socat (1.7.3.2-2ubuntu2) ...
Selecting previously unselected package kubelet.
Preparing to unpack .../4-kubelet_1.14.0-00_amd64.deb ...
Unpacking kubelet (1.14.0-00) ...
Selecting previously unselected package kubectl.
Preparing to unpack .../5-kubectl_1.14.0-00_amd64.deb ...
Unpacking kubectl (1.14.0-00) ...
Selecting previously unselected package kubeadm.
Preparing to unpack .../6-kubeadm_1.14.0-00_amd64.deb ...
Unpacking kubeadm (1.14.0-00) ...
Setting up conntrack (1:1.4.4+snapshot20161117-6ubuntu2) ...
Setting up kubernetes-cni (0.7.5-00) ...
Setting up cri-tools (1.12.0-00) ...
Setting up socat (1.7.3.2-2ubuntu2) ...
Setting up kubelet (1.14.0-00) ...
Created symlink /etc/systemd/system/multi-user.target.wants/kubelet.service → /lib/systemd/system/kubelet.service.
Setting up kubectl (1.14.0-00) ...
Processing triggers for man-db (2.8.3-2ubuntu0.1) ...
Setting up kubeadm (1.14.0-00) ...
$ kubeadm version
kubeadm version: &version.Info{Major:"1", Minor:"14", GitVersion:"v1.14.0", GitCommit:"641856db18352033a0d96dbc99153fa3b27298e5", GitTreeState:"clean", BuildDate:"2019-03-25T15:51:21Z", GoVersion:"go1.12.1", Compiler:"gc", Platform:"linux/amd64"}
Step 8. Initializing the master: k8s-master
To pull the image is recommended to save time on initialization:
$ kubeadm config images pull
[config/images] Pulled k8s.gcr.io/kube-apiserver:v1.14.0
[config/images] Pulled k8s.gcr.io/kube-controller-manager:v1.14.0
[config/images] Pulled k8s.gcr.io/kube-scheduler:v1.14.0
[config/images] Pulled k8s.gcr.io/kube-proxy:v1.14.0
[config/images] Pulled k8s.gcr.io/pause:3.1
[config/images] Pulled k8s.gcr.io/etcd:3.3.10
[config/images] Pulled k8s.gcr.io/coredns:1.3.1
Initializing the master with token ttl = 0, so the token never expires and the api server address:
$ sudo sudo kubeadm init --token-ttl=0 --pod-network-cidr=10.244.0.0/16 --apiserver-advertise-address=xxx.xxx.xxx.23
[init] Using Kubernetes version: v1.14.0
[preflight] Running pre-flight checks
    [WARNING IsDockerSystemdCheck]: detected "cgroupfs" as the Docker cgroup driver. The recommended driver is "systemd". Please follow the guide at https://kubernetes.io/docs/setup/cri/
[preflight] Pulling images required for setting up a Kubernetes cluster
[preflight] This might take a minute or two, depending on the speed of your internet connection
[preflight] You can also perform this action in beforehand using 'kubeadm config images pull'
[kubelet-start] Writing kubelet environment file with flags to file "/var/lib/kubelet/kubeadm-flags.env"
[kubelet-start] Writing kubelet configuration to file "/var/lib/kubelet/config.yaml"
[kubelet-start] Activating the kubelet service
[certs] Using certificateDir folder "/etc/kubernetes/pki"
[certs] Generating "ca" certificate and key
[certs] Generating "apiserver" certificate and key
[certs] apiserver serving cert is signed for DNS names [k8s-master kubernetes kubernetes.default kubernetes.default.svc kubernetes.default.svc.cluster.local] and IPs [10.96.0.1 xxx.xxx.xxx.23]
[certs] Generating "apiserver-kubelet-client" certificate and key
[certs] Generating "front-proxy-ca" certificate and key
[certs] Generating "front-proxy-client" certificate and key
[certs] Generating "etcd/ca" certificate and key
[certs] Generating "etcd/healthcheck-client" certificate and key
[certs] Generating "etcd/peer" certificate and key
[certs] etcd/peer serving cert is signed for DNS names [k8s-master localhost] and IPs [xxx.xxx.xxx.23 127.0.0.1 ::1]
[certs] Generating "apiserver-etcd-client" certificate and key
[certs] Generating "etcd/server" certificate and key
[certs] etcd/server serving cert is signed for DNS names [k8s-master localhost] and IPs [xxx.xxx.xxx.23 127.0.0.1 ::1]
[certs] Generating "sa" key and public key
[kubeconfig] Using kubeconfig folder "/etc/kubernetes"
[kubeconfig] Writing "admin.conf" kubeconfig file
[kubeconfig] Writing "kubelet.conf" kubeconfig file
[kubeconfig] Writing "controller-manager.conf" kubeconfig file
[kubeconfig] Writing "scheduler.conf" kubeconfig file
[control-plane] Using manifest folder "/etc/kubernetes/manifests"
[control-plane] Creating static Pod manifest for "kube-apiserver"
[control-plane] Creating static Pod manifest for "kube-controller-manager"
[control-plane] Creating static Pod manifest for "kube-scheduler"
[etcd] Creating static Pod manifest for local etcd in "/etc/kubernetes/manifests"
[wait-control-plane] Waiting for the kubelet to boot up the control plane as static Pods from directory "/etc/kubernetes/manifests". This can take up to 4m0s
[kubelet-check] Initial timeout of 40s passed.
[apiclient] All control plane components are healthy after 44.629712 seconds
[upload-config] storing the configuration used in ConfigMap "kubeadm-config" in the "kube-system" Namespace
[kubelet] Creating a ConfigMap "kubelet-config-1.14" in namespace kube-system with the configuration for the kubelets in the cluster
[upload-certs] Skipping phase. Please see --experimental-upload-certs
[mark-control-plane] Marking the node k8s-master as control-plane by adding the label "node-role.kubernetes.io/master=''"
[mark-control-plane] Marking the node k8s-master as control-plane by adding the taints [node-role.kubernetes.io/master:NoSchedule]
[bootstrap-token] Using token: 4zldnt.hpqytbzjhkn4f1om
[bootstrap-token] Configuring bootstrap tokens, cluster-info ConfigMap, RBAC Roles
[bootstrap-token] configured RBAC rules to allow Node Bootstrap tokens to post CSRs in order for nodes to get long term certificate credentials
[bootstrap-token] configured RBAC rules to allow the csrapprover controller automatically approve CSRs from a Node Bootstrap Token
[bootstrap-token] configured RBAC rules to allow certificate rotation for all node client certificates in the cluster
[bootstrap-token] creating the "cluster-info" ConfigMap in the "kube-public" namespace
[addons] Applied essential addon: CoreDNS
[addons] Applied essential addon: kube-proxy

Your Kubernetes control-plane has initialized successfully!

To start using your cluster, you need to run the following as a regular user:

  mkdir -p $HOME/.kube
  sudo cp -i /etc/kubernetes/admin.conf $HOME/.kube/config
  sudo chown $(id -u):$(id -g) $HOME/.kube/config

You should now deploy a pod network to the cluster.
Run "kubectl apply -f [podnetwork].yaml" with one of the options listed at:
  https://kubernetes.io/docs/concepts/cluster-administration/addons/

Then you can join any number of worker nodes by running the following on each as root:

kubeadm join xxx.xxx.xxx.23:6443 --token <THE_TOKEN> \
    --discovery-token-ca-cert-hash sha256:<THE_CA_CERT_HASH>
The last two lines are the one you will use to join nodes to the cluster; so, save them somewhere reachable.
Configure to run with a regular user without sudo:
$ mkdir -p $HOME/.kube
$ sudo cp -i /etc/kubernetes/admin.conf $HOME/.kube/config
$ sudo chown $(id -u):$(id -g) $HOME/.kube/config
Check the nodes:
$ kubectl get nodes
NAME         STATUS     ROLES    AGE     VERSION
k8s-master   NotReady   master   2m29s   v1.14.0
The master is not ready because there is no pod network installed, but it should be ok for checking pods:
$ kubectl get pods --all-namespaces
NAMESPACE     NAME                                 READY   STATUS    RESTARTS   AGE
kube-system   coredns-fb8b8dccf-dt8jc              0/1     Pending   0          4m18s
kube-system   coredns-fb8b8dccf-jqgbc              0/1     Pending   0          4m17s
kube-system   etcd-k8s-master                      1/1     Running   0          3m39s
kube-system   kube-apiserver-k8s-master            1/1     Running   0          3m41s
kube-system   kube-controller-manager-k8s-master   1/1     Running   0          3m34s
kube-system   kube-proxy-nzkbd                     1/1     Running   0          4m18s
kube-system   kube-scheduler-k8s-master            1/1     Running   0          3m56s
Step 9. Install pod networking: Flannel
$ kubectl apply -f https://raw.githubusercontent.com/coreos/flannel/master/Documentation/kube-flannel.yml
podsecuritypolicy.extensions/psp.flannel.unprivileged created
clusterrole.rbac.authorization.k8s.io/flannel created
clusterrolebinding.rbac.authorization.k8s.io/flannel created
serviceaccount/flannel created
configmap/kube-flannel-cfg created
daemonset.extensions/kube-flannel-ds-amd64 created
daemonset.extensions/kube-flannel-ds-arm64 created
daemonset.extensions/kube-flannel-ds-arm created
daemonset.extensions/kube-flannel-ds-ppc64le created
daemonset.extensions/kube-flannel-ds-s390x created
Now everything is RUNNING:
$ kubectl get pods --all-namespaces
NAMESPACE     NAME                                 READY   STATUS    RESTARTS   AGE
kube-system   coredns-fb8b8dccf-dt8jc              1/1     Running   0          6m35s
kube-system   coredns-fb8b8dccf-jqgbc              1/1     Running   0          6m34s
kube-system   etcd-k8s-master                      1/1     Running   0          5m56s
kube-system   kube-apiserver-k8s-master            1/1     Running   0          5m58s
kube-system   kube-controller-manager-k8s-master   1/1     Running   0          5m51s
kube-system   kube-flannel-ds-amd64-5f9rv          1/1     Running   0          46s
kube-system   kube-proxy-nzkbd                     1/1     Running   0          6m35s
kube-system   kube-scheduler-k8s-master            1/1     Running   0          6m13s
Set bridge-to-bridge communication on both machine and remember to set it on every new node:
$ sudo sysctl net.bridge.bridge-nf-call-iptables=1
net.bridge.bridge-nf-call-iptables = 1
Step 10. Join k8s-node-1 to the cluster
Use the last command shown on the kubeadm init output to join k8s-node-1 to the cluster:
$ kubeadm join xxx.xxx.xxx.23:6443 --token <THE_TOKEN> \
    --discovery-token-ca-cert-hash sha256:<THE_CA_CERT_HASH>
[preflight] Running pre-flight checks
    [WARNING IsDockerSystemdCheck]: detected "cgroupfs" as the Docker cgroup driver. The recommended driver is "systemd". Please follow the guide at https://kubernetes.io/docs/setup/cri/
[preflight] Reading configuration from the cluster...
[preflight] FYI: You can look at this config file with 'kubectl -n kube-system get cm kubeadm-config -oyaml'
[kubelet-start] Downloading configuration for the kubelet from the "kubelet-config-1.14" ConfigMap in the kube-system namespace
[kubelet-start] Writing kubelet configuration to file "/var/lib/kubelet/config.yaml"
[kubelet-start] Writing kubelet environment file with flags to file "/var/lib/kubelet/kubeadm-flags.env"
[kubelet-start] Activating the kubelet service
[kubelet-start] Waiting for the kubelet to perform the TLS Bootstrap...

This node has joined the cluster:
* Certificate signing request was sent to apiserver and a response was received.
* The Kubelet was informed of the new secure connection details.

Run 'kubectl get nodes' on the control-plane to see this node join the cluster.
On k8s-master get the nodes:
$ kubectl get nodes
NAME         STATUS     ROLES    AGE   VERSION
k8s-master   Ready      master   14m   v1.14.0
k8s-node-1   NotReady   <none>   37s   v1.14.0
It is not ready yet, try again:
$ kubectl get nodes
NAME         STATUS   ROLES    AGE   VERSION
k8s-master   Ready    master   15m   v1.14.0
k8s-node-1   Ready    <none>   76s   v1.14.0
And check the pods are ok:
$ kubectl get pods --all-namespaces
NAMESPACE     NAME                                 READY   STATUS    RESTARTS   AGE
kube-system   coredns-fb8b8dccf-dt8jc              1/1     Running   0          15m
kube-system   coredns-fb8b8dccf-jqgbc              1/1     Running   0          15m
kube-system   etcd-k8s-master                      1/1     Running   0          14m
kube-system   kube-apiserver-k8s-master            1/1     Running   0          14m
kube-system   kube-controller-manager-k8s-master   1/1     Running   0          14m
kube-system   kube-flannel-ds-amd64-5f9rv          1/1     Running   0          9m27s
kube-system   kube-flannel-ds-amd64-5zlgj          1/1     Running   0          113s
kube-system   kube-proxy-929rk                     1/1     Running   0          113s
kube-system   kube-proxy-nzkbd                     1/1     Running   0          15m
kube-system   kube-scheduler-k8s-master            1/1     Running   0          14m
This is it! Congratulations!
Accessing the cluster from the local computer
The cluster is installed and configured, but you need to ssh to a node to access is with kubectl. It would be better to access it locally. There are multiple ways to do this, but I found this explaining a more straightforward way. It is not as secure as possible, but it should work. If you have your computer configured to access a cluster already, and you apply the method on that article, most likely things will be messed up on your computer. I took another approach based on that article method.
First, scp the .kube directory to your computer on a known location:
scp -r <USER>@xxx.xxx.xxx.23:~/.kube ~/projects/LocalK8s
Then, copy the config to that location with another name:
cp ~/projects/LocalK8s/.kube/config ~/projects/LocalK8s/config-localk8s
Then create a file env.sh to export the KUBECONFIG variable and source that file:
$ echo "export KUBECONFIG=config-localk8s" > env.sh
$ source env.sh
$ kubectl get nodes -o wide
NAME         STATUS   ROLES    AGE   VERSION   INTERNAL-IP    EXTERNAL-IP   OS-IMAGE             KERNEL-VERSION      CONTAINER-RUNTIME
k8s-master   Ready    master   49m   v1.14.0   xxx.xxx.xxx.23   <none>        Ubuntu 18.04.2 LTS   4.15.0-46-generic   docker://18.9.2
k8s-node-1   Ready    <none>   36m   v1.14.0   xxx.xxx.xxx.28   <none>        Ubuntu 18.04.2 LTS   4.15.0-46-generic   docker://18.9.2
Now the only thing to remember to work with this cluster from local is to source the env.sh
Deploy the Web UI
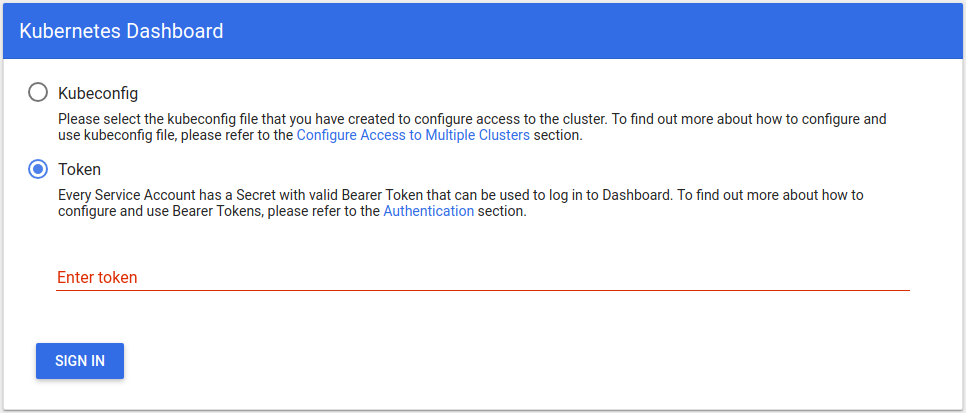
Everything should be good, but let’s try to deploy something on the cluster to see if it works. A good candidate is Web UI - Dashboard. If we get to the dashboard “authentication” form, we are more certain everything is working fine. Let’s do it!
The instructions on how to install the Web UI(Dashboard) are here
$ kubectl apply -f https://raw.githubusercontent.com/kubernetes/dashboard/master/aio/deploy/recommended/kubernetes-dashboard.yaml
secret/kubernetes-dashboard-certs created
secret/kubernetes-dashboard-csrf created
serviceaccount/kubernetes-dashboard created
role.rbac.authorization.k8s.io/kubernetes-dashboard-minimal created
rolebinding.rbac.authorization.k8s.io/kubernetes-dashboard-minimal created
deployment.apps/kubernetes-dashboard created
service/kubernetes-dashboard created
$ kubectl get pods --all-namespaces
NAMESPACE     NAME                                    READY   STATUS    RESTARTS   AGE
kube-system   coredns-fb8b8dccf-dt8jc                 1/1     Running   0          51m
kube-system   coredns-fb8b8dccf-jqgbc                 1/1     Running   0          51m
kube-system   etcd-k8s-master                         1/1     Running   0          50m
kube-system   kube-apiserver-k8s-master               1/1     Running   0          50m
kube-system   kube-controller-manager-k8s-master      1/1     Running   1          50m
kube-system   kube-flannel-ds-amd64-5f9rv             1/1     Running   0          45m
kube-system   kube-flannel-ds-amd64-5zlgj             1/1     Running   0          38m
kube-system   kube-proxy-929rk                        1/1     Running   0          38m
kube-system   kube-proxy-nzkbd                        1/1     Running   0          51m
kube-system   kube-scheduler-k8s-master               1/1     Running   1          51m
kube-system   kubernetes-dashboard-5f7b999d65-bl897   1/1     Running   0          44s
You need to wait for the dashboard pod to be running. Now it is time to run the kubectl proxy and see if we can get there
$ kubectl proxy
Starting to serve on 127.0.0.1:8001
The Dashboard should be accessible at http://127.0.0.1:8001/api/v1/namespaces/kube-system/services/https:kubernetes-dashboard:/proxy/#!/login
If you get to a page similar to the following, the cluster is working:
Conclusions
That is all for now. You have a working Kubernetes cluster ready to schedule your workload. The journey was not easy, but it is doable. What could be next? I am thinking about adding ARM nodes to the cluster like Raspberry Pi and/or Jetson TX1. Also, I will start creating small projects to use it.
Happy coding!