In the last three years, I maintained a FlighAware ADS-B receiver running at home(here is the post where I described it). It is interesting to see the positions of the aircraft around you. Since the beginning, I was thinking in a way to share this application with my friends or to be able to see the planes from another location outside my local network. A couple of months back, I signed up for a Google Cloud account, and I have 400 dollars in credit there. This looked like an opportunity to push that data somewhere and share it on a web site. This post is about how I did it and how you can do it as well. It is not hard.
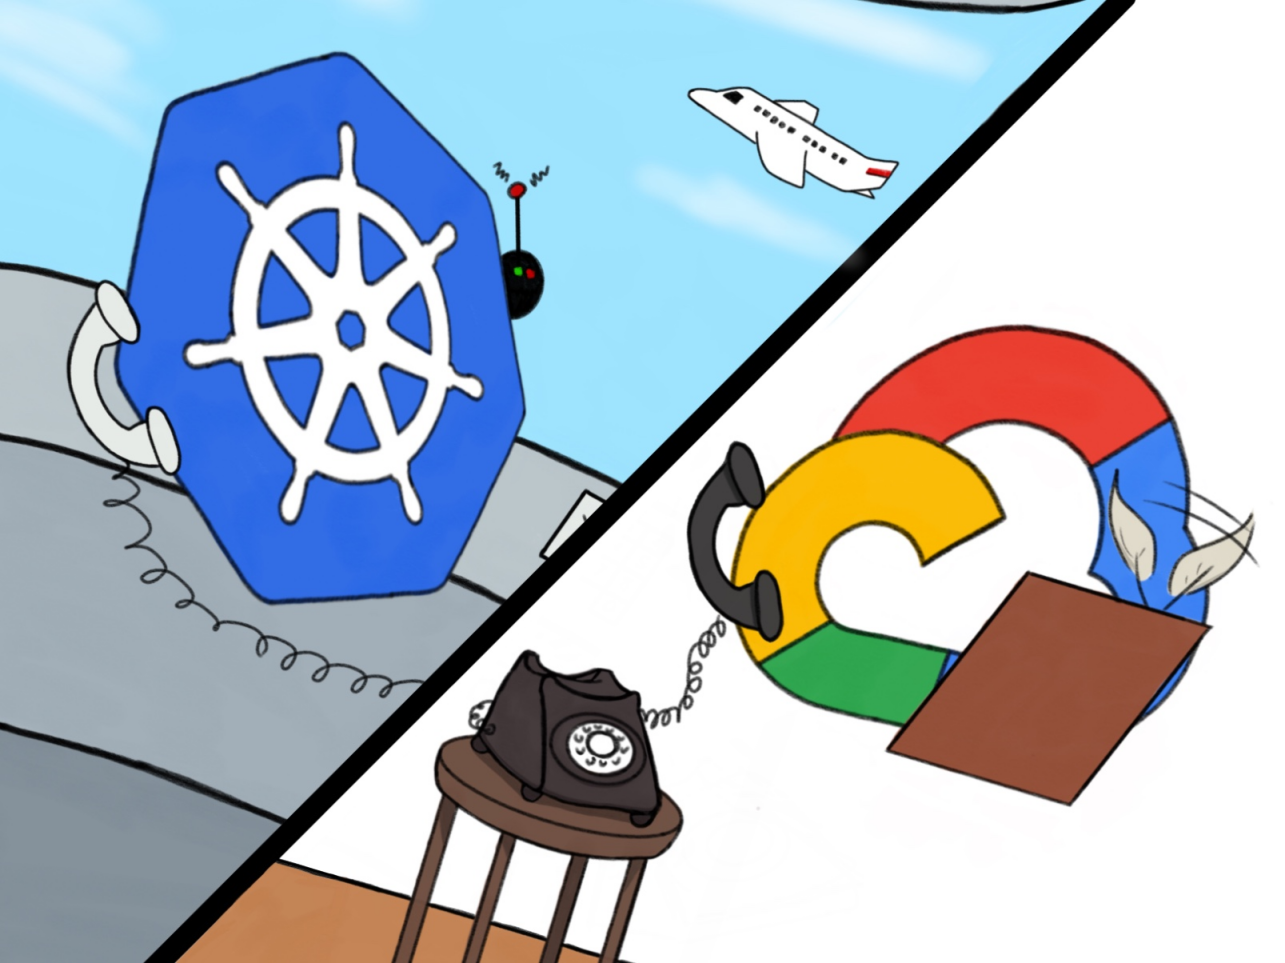
Note: I asked my 14 years old daughter to draw this picture for me after I explained to her what I was doing. It is quite good, and I am proud of her work. They grow so fast. :-D
Here we go! It is a long journey, but I enjoyed every bit. All the code and scripts I used could be found in this repo. Here are the steps I follow:
- Get the data: I need something to ask the Raspberry Pi running the receiver for the data. The amount of messages the planes send is massive. I needed to store the data in a cheap but reliable place.
- Keep the data flowing: I needed the “data collection” to be up most of the time.
- The data should be shown on a UI: Data without presentation is not too useful, and the whole idea was to see the data not just collect it.
Those steps will be explained in details of the following sections.
Get the data
Looking at the local web application and its repo I realized I could use the data/aircraft.json information to get the info out more quickly than consuming the data from port 30005 or 30003.
This data from data/aircraft.json:
{
  "now" : 1554347065.9,
  "messages" : 674331066,
  "aircraft" : [
    ...
    {"hex":"c08562","squawk":"4304","flight":"LF1     ","lat":43.483887,"lon":-79.794290,"nucp":0,"seen_pos":3.5,"altitude":1825,"vert_rate":-512,"track":146,"speed":162,"mlat":["lat","lon","track","speed","vert_rate"],"tisb":[],"messages":257,"seen":0.2,"rssi":-24.6},
    ...
  ]
}
is simpler than:
$ curl http://192.168.1.20:30003
MSG,8,1,1,AA9202,1,2019/05/17,01:24:57.884,2019/05/17,01:24:57.929,,,,,,,,,,,,0
MSG,7,1,1,A7B574,1,2019/05/17,01:24:57.904,2019/05/17,01:24:57.932,,32000,,,,,,,,,,
MSG,7,1,1,C02E8F,1,2019/05/17,01:24:57.966,2019/05/17,01:24:57.988,,11050,,,,,,,,,,
...
The second one is could be more interesting because it give you more information about when the data is received, but the UI used on the receiver used the data/aircraft.json. It looks like it is better not to rewrite that UI, but “lift” it to the clouds.
data/aircraft.json was the winner, but where should I store it. First, I thought of sending the data to a GCP PubSub topic, process the data with a GCP Cloud function and store it in Big Query. It was a great idea, and I implemented the collector and the cloud function. It feels great to see the BigQuery table growing with exciting data, but now what? Build a UI? Sure, it will be great, but very time-consuming. Again, the idea was to share the data easily. This was a dead end. Ok, not so dead, but a not-now end. If the web application there was expecting data/aircraft.json why not to store it in a GCP Storage bucket and serve the same data over a Firebase hosting and cloud functions, that would be a more straightforward way to share the data.
The Python script to make a web request to the Raspberry Pi and store the results on a bucket was straightforward. Here is part of it and the rest is here:
while True:
  r = requests.get(f'{receiver_url}/data/aircraft.json')

  if r.status_code != 200:
    raise ValueError(f'ERROR: getting aircraft json data :{r.text}')

  aircraft_data = r.json()

  now = aircraft_data['now']
  info_data = {
    'now': now,
    'aircraft_count' : len(aircraft_data['aircraft']),
    'messages': aircraft_data['messages']
  }
  print('INFO: ' + json.dumps(info_data))

  file_name = f'{device_id}/{now}.json'

  blob = Blob(file_name, bucket)
  blob.upload_from_string(json.dumps(aircraft_data), content_type='application/json')

  print(f'INFO: Uploaded : {file_name}')

  time.sleep(sampling_period)
These are a couple of scripts that could be interesting to set up the environment:
- create-service-account.sh: Creates a GCP service account and extracts its key to be used later on to save the data into the bucket.
- create-bucket.sh: Creates the bucket with 90 days life cycle and ACL; so, the service account can access it.
- bucket-lifecycle.json: Bucket life cycle definition.
Great! We have the data on a GCP Storage bucket. Now, we need to make sure it keeps going there.
Keep the data flowing
Even when I could run the script manually, I didn’t want to babysit it, and I didn’t want to increase its complexity by handling failure conditions. The script will fail, if the receiver is not there, or if there is no internet connection. That is ok. It not to restart again over time. There are a few ways to keep the process running, but I have a two-node Kubernetes cluster I could use for that task. Here are the steps needed to have this script running on my local Kubernetes:
Creating a Docker image locally
First, we need a Docker file:
FROM python:3.7-alpine
WORKDIR /app
ADD main.py /app
ADD requirements.txt /app
ADD key.json /app

ENV GOOGLE_APPLICATION_CREDENTIALS=key.json

RUN pip install -r requirements.txt

CMD ["python", "main.py"]
I know it is pretty to save the key within the image. This key is for the service account created when the collector script was using, and it has no permissions but to upload files to a GCP bucket. In addition to that, we could use a private container registry to ensure that the image doesn’t go anywhere we don’t want it to go. We can create the image with docker build -t ${IMAGE_NAME} .. These are the script I used.
The image is local now, and we can run it locally with:
$ docker run -it \
  --env DEVICE_ID=docker-receiver \
  --env OUTPUT_BUCKET=${OUTPUT_BUCKET} \
  --env SAMPLING_PERIOD_SECONDS=${SAMPLING_PERIOD_SECONDS} \
  --env RECEIVER_URL=${RECEIVER_URL} \
  ${IMAGE_NAME}
The script I used is here.
Upload the image to a registry
There are a few container registries available, but I decided to use Google’s Container Registry. To use it, we need to run a few commands:
# Enable container registry on the current project
$ gcloud services enable containerregistry.googleapis.com
...

# Tag the image
$ docker tag ${IMAGE_NAME} \
  gcr.io/${PROJECT_ID}/${IMAGE_NAME}:${IMAGE_TAG}
...

# Push image
$ docker push gcr.io/${PROJECT_ID}/${IMAGE_NAME}:${IMAGE_TAG}
The script I used are: enable-container-registry.sh, tag-image-for-gcp.sh push-image-to-gcp.sh
Configure Kubernetes to use that registry
This step is a bit more complicated. First, we need a GCP service account for Kubernetes to use:
gcloud iam service-accounts create $K8S_GCP_SERVICE_ACCOUNT

gcloud iam service-accounts keys create ~/GCP_${PROJECT_ID}_$K8S_GCP_SERVICE_ACCOUNT.json \
  --iam-account ${K8S_GCP_SERVICE_ACCOUNT}@${PROJECT_ID}.iam.gserviceaccount.com

gcloud projects add-iam-policy-binding ${PROJECT_ID} \
 --member serviceAccount:${K8S_GCP_SERVICE_ACCOUNT}@${PROJECT_ID}.iam.gserviceaccount.com \
 --role roles/storage.objectViewer
We have the key for that account that we need to put in Kubernetes as secret(also it is good to have a namespace for our project; so we create one):
$ kubectl create namespace ${K8S_NAMESPACE}
...

# Create secret gcr-json-key
$ kubectl create secret docker-registry gcr-json-key \
--docker-server=gcr.io \
--docker-username=_json_key \
--docker-password="$(cat ~/GCP_${PROJECT_ID}_$K8S_GCP_SERVICE_ACCOUNT.json)" \
--docker-email=any@valid.email \
--namespace ${K8S_NAMESPACE}
...

# Path default service account with the secret
$ kubectl patch serviceaccount default \
-p '{"imagePullSecrets": [{"name": "gcr-json-key"}]}' \
--namespace ${K8S_NAMESPACE}
The scripts I used are: create-k8s-namespace.sh, create-k8s-docker-registry-secret.sh and patching-k8s-serviceaccount-default.sh
To understand this process further, the following two links will be useful:
- Google Cloud Registry (GCR) with external Kubernetes
- Using Google Container Registry with Kubernetes
Create a deployment and apply in the cluster
Now the cluster is ready to create pods from our image, and we need to create a deployment. Creating a deployment using environment variables to configure it is tricky, or at least it was not easy for me to find a way how to do it. I end up using this template:
apiVersion: apps/v1
kind: Deployment
metadata:
  name: aircraft-to-bucket-deployment
  labels:
    app: aircraft-to-bucket
spec:
  replicas: 1
  selector:
    matchLabels:
      app: aircraft-to-bucket
  template:
    metadata:
      labels:
        app: aircraft-to-bucket
    spec:
      containers:
      - name: aircraft-to-bucket
        image: gcr.io/${PROJECT_ID}/${IMAGE_NAME}:${IMAGE_TAG}
        env:
        - name: DEVICE_ID
          value: "k8s-receiver"
        - name: OUTPUT_BUCKET
          value: "${OUTPUT_BUCKET}"
        - name: SAMPLING_PERIOD_SECONDS
          value: "${SAMPLING_PERIOD_SECONDS}"
        - name: RECEIVER_URL
          value: "${RECEIVER_URL}"
And applying the deployment as follows:
envsubst < ./scripts/k8s/deployment.template.yaml > ./scripts/k8s/deployment.yaml

kubectl apply -f ./scripts/k8s/deployment.yaml \
--namespace ${K8S_NAMESPACE}
To verify your pod is running:
$ kubectl get pods --namespace $K8S_NAMESPACE
NAME                                             READY   STATUS    RESTARTS   AGE
aircraft-to-bucket-deployment-5988b56857-tzz4d   1/1     Running   0          1h
Congratulations! The collection will be running now, and Kubernetes will bring it back if it crashes. I have this running for a few weeks now. It is working fine only crashing when the Raspberry Pi crashes. I need to restart the Raspberry Pi in those cases, and it is running again in a while. Yes, I don’t have to babysit the collector but the receiver. There is room for improvement in the future to handle this.
The data should be shown on a UI
All good! We see the files growing inside the bucket. It is time to “lift” the web application. I choose to use Firebase as it is almost “free” hosting for a SPA application and nice integration to cloud functions to serve the data from the bucket in a secure fashion. What I did was to create a Firebase project with cloud functions and reverse engineer the dump1090 public_html see how it was calling the APIs. It turns out I have to implement the following end-point:
- /data/status.json: Informs what type of receiver it is.
- /data/upintheair.json: I didn’t understand this one quite well, but I just returned what the application was returned.
- /data/receiver.json: Returns information about the receiver. Ex. Version, refresh rate, latitude, longitude, how many history data it needs to load.
- /data/history_:number.json: Historical data. Based on the documentation is the data from
number * 30seconds in the past. Not exactly, but I implement it in that way. - /data/aircraft.json: Well… this is exactly the data we are saving in the bucket.
Knowing what I need to reproduce, I made the following changes to the application to run in on Firebase:
- Added an email/password authentication to control who I share this data.
- Added Firebase specific settings.
- Rewrite the
/data/**.jsonto my cloud function and send the authentication token with the request.
This change looks small, but there is more code here than in the rest of the project. Most of the changes happen in the file public_html/script.js. It is a complex application, and I enjoyed to remember the old days of jQuery for front-end development. There are too many changes to detail each one of them here. The application is on my repo. Please, feel free to try your own or modify this one.
After deployments, we get to the web application that looks like this:
I know… very impressive ;-) but it gets better when you log in:
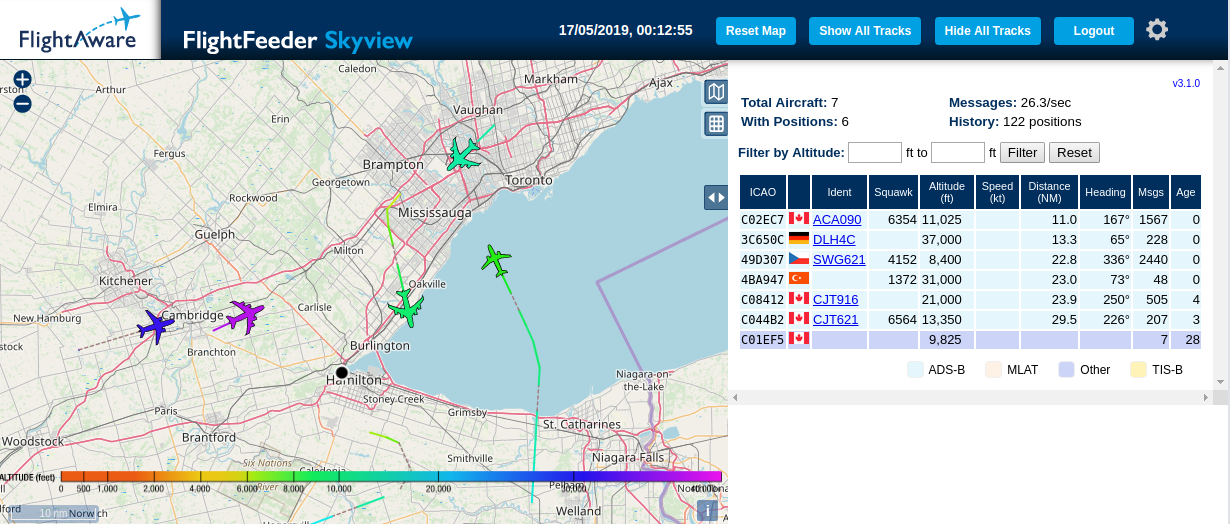
Finally! It is done. It was a long journey, but this is it.
Conclusions
Let’s recap on the what is going on here:
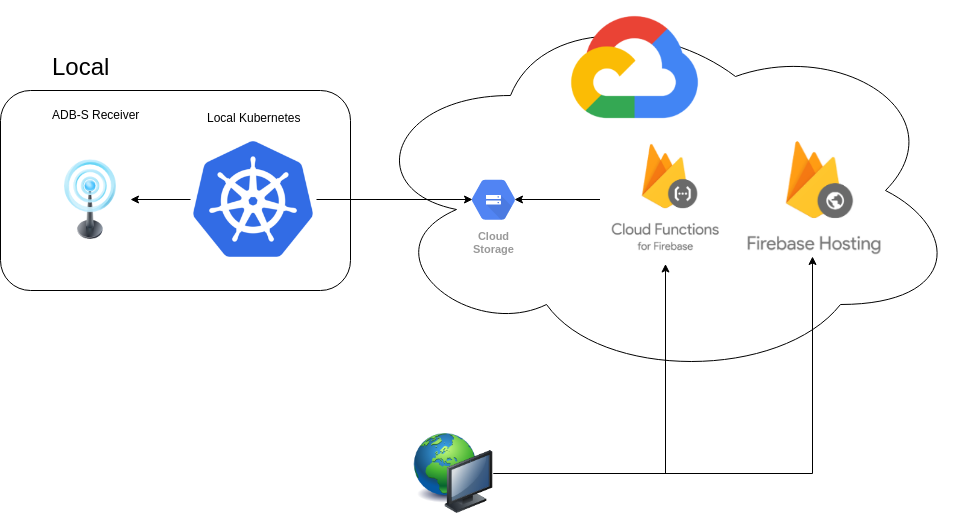
- The ADS-B receiver receives and aggregates data aircraft are sending.
- A script is running in a pod inside a Local Kubernetes cluster. It requests the data from the ADS-B receiver and stores it on a GCP Storage bucket.
- A static web site is hosted on Firebase and it uses a Cloud Function for Firebase to retrieve the data sent by the aircraft.
- A browser renders that data over a map.
- And we all enjoy it!
It was a fantastic project. I enjoyed it. I am looking forward to figuring out what else can I do with that data. I think a video showing all the aircraft trajectories in a day could be an exciting next step.
If you are interested in, see the application working, contact me, and I will create an account for you.
Happy coding!