The second term of Udacity’s Self-Driving Car Nanodegree is over. It was an open window to a new set of ideas, theories and capabilities: Sensor fusion, Localization, Control and C++. If you have some years of experience developing software, you might be surprised to see C++ in the same sentence as new ideas. It was a big surprise to me as well.
I have met a few people with opinions about C++ regarding it as an old and difficult language. For me, the biggest win of this term was my rediscovering of C++ and how much it has evolved since I use it 20 years ago for the first time. At that time, I use C++ only to speed up my Matlab computation on a Pentium machine, and some MFC projects later on. It was not a great experience, and it was not by accident I found myself moving away from those project and jumping into other languages like Java, C# and more recently Scala and Python. When I started this term, there was a voice deep inside my mind saying: the nightmare is back. And here it comes, C++ is the new red! Its evolution over these years is incredible. While C++11 introduced significant features, its evolution continued with C++17 and so on. Each standard is adding new ideas. Here is a nice article regarding C++17 features. Is type inference a dream in some language (Ex. Java)? Not in C++11. There, it is a reality.
![]()
Lessons and projects
Let’s go back to the Udacity’s Self-Driving Car Nanodegree - Term 2, it consists of fourteen lectures, five projects and a C++ “checkpoint.”
Sensor fusion
The first few lessons are on sensor fusion. The starting point is to understand what is the problem of estimating the system state(Ex. the car position and velocity) base on a set of noisy measurements(Ex. Radar and Lidar measurements). By “fusing” the measurements, the resulting state has less uncertainty than using a single measurement. The technics introduced were: Kalman filter, Extended Kalman filter and Unscented Kalman filter. These lessons are also the transition from Python to C++. In the middle of them, there is a C++ “checkpoint” to make sure you are comfortable with C++. There is also a link to Udacity’s C++ For Programmers course. It is a good idea to refresh/acquire C++ before facing the projects.
Project 1 - Extended Kalman Filter
This is the first C++ project of the course, and it could be intimidating, but it doesn’t have to. There is a complete lesson explaining what needs to be done. The project consists of implementing an Extended Kalman filter(EKF) to estimate a car position based on Radar and Lidar noisy measurements provided by Udacity’s simulator. This is how the simulator looks like:
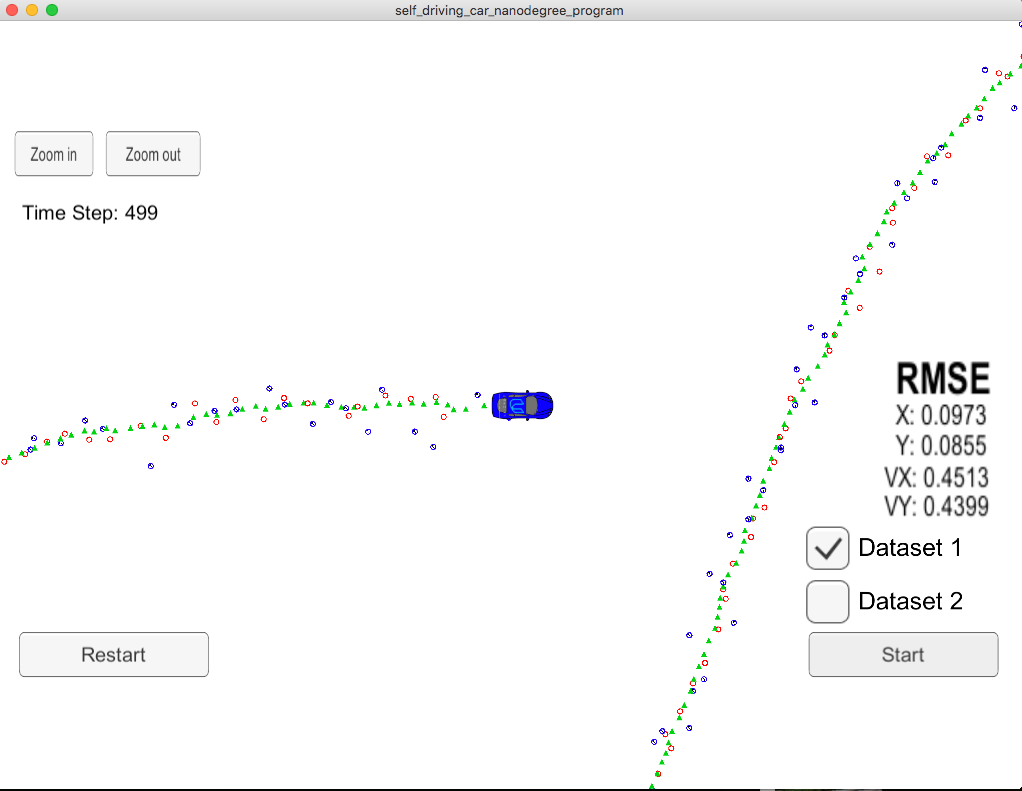
The simulator and your EKF communicate over WebSocket, and the EKF use uWebSockets implementation. That part is already done for you on the seed project provided my Udacity, but it is a cool framework to see working. Take a look at my solution here.
Project 2 - Unscented Kalman Filter
This project is pretty much the same setup as the first project, but implementing an Unscented Kalman Filter(UKF). Why is called unscented? Sebastian explained the creators of this filter believed the EKF stinks due to the linearization applied there. A sense of humor is always good! Here is a link to my solution.
Localization
There are three lessons on about localization, one on vehicle models(Bicycle Model), and one on Particle filter. Before these lessons, I was sure GPS was enough to know where I was. Now, not so much. The technics shown are Bayesian filter for 1D localization in C++, Bicycle Motion Model, Particle filter for 2D position estimation. This part of the course was really interesting to me, and I felt I just scratched the surface with half a nail. Hopefully, I will have time to learn more about it in the future.
Project 3 - Kidnapped Vehicle
In this project, you need to implement a Particle Filter applied to a Kidnapped robot(car) problem. Udacity’s simulator will send you noisy landmark observation from a car, and you need to estimate car position. This is how the simulator looks on a successful execution:
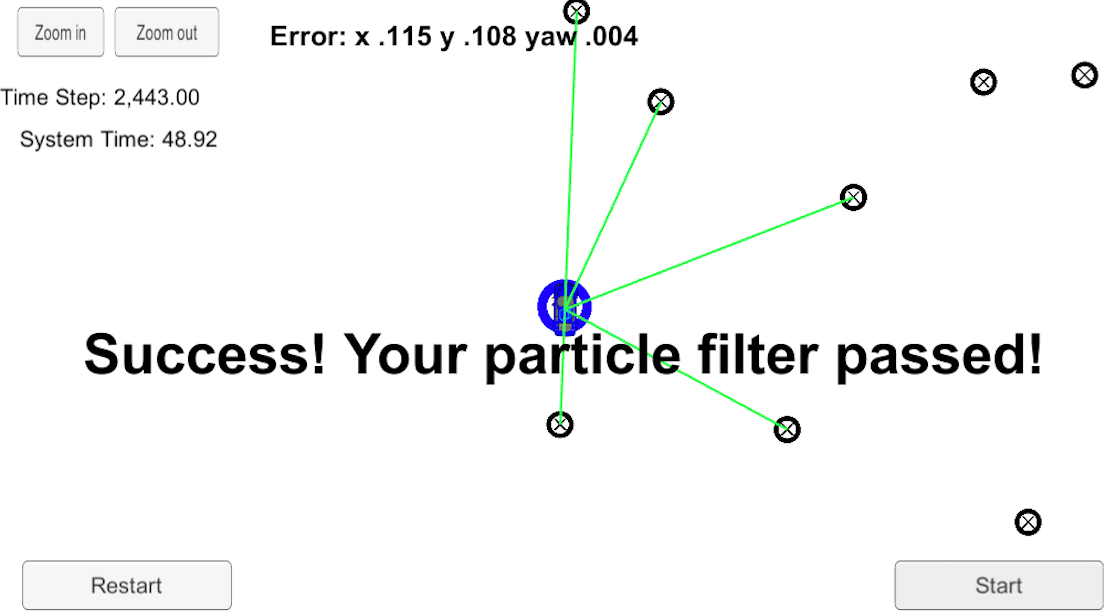
Here is the link to my solution.
Control
Control theory is a broad subject. I remember a lot of Laplace transform, Nyquist stability, and other advance math at university. It was surprised again with these part of the lessons where the basic control concepts could be express with simpler expressions to make them more understandable. There is one lesson for PID controller, one for vehicle kinematic and dynamic models(more advanced than the one on the localization lessons), and one lesson Model Prediction Control.
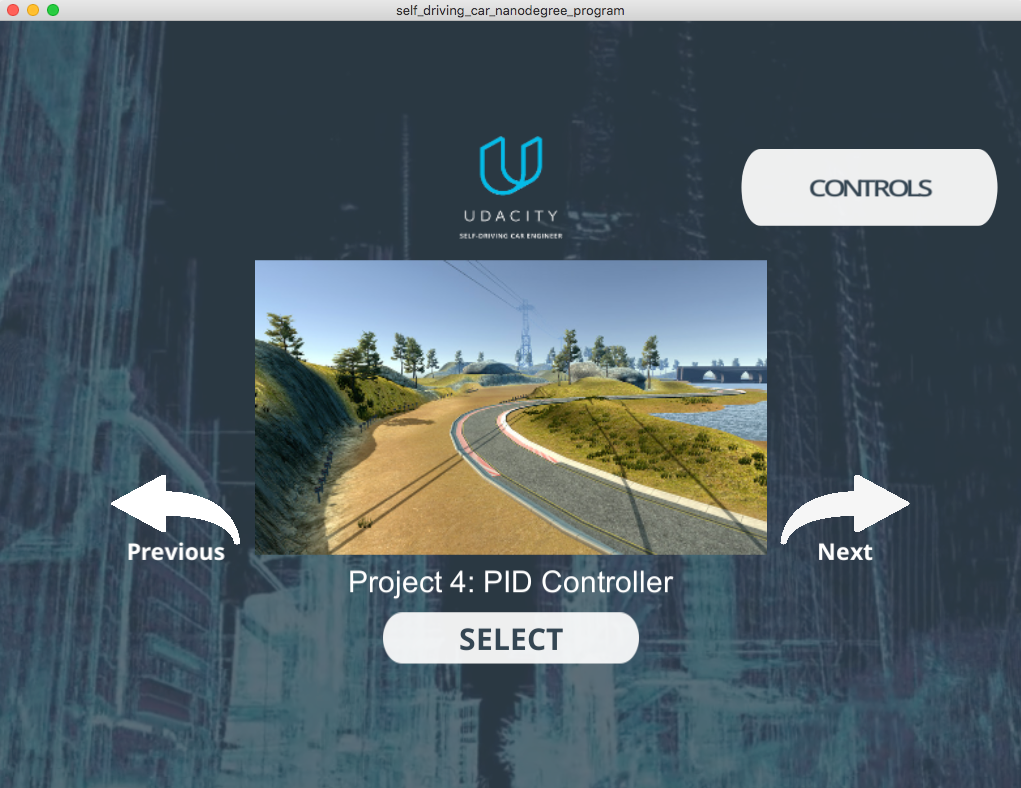
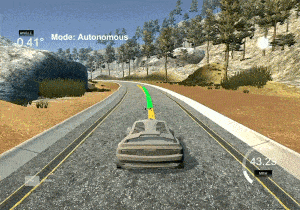
Project 4 - PID Control
This time we need to implement a PID controller to control the car receiving a cross-track error from the simulator and responding with a steering angle and throttle to control the car. The challenging part here is to not go too fast in the sense that the car could go to the lake on the simulator very easily. It is better to go step by step until the car goes all the way modifying the proportional, integral and differential parameters by hand. Here is an image of the simulator:
The fun part is to see the car running. There are a few videos inside my solution repo. The videos are on the … /videos path. It is interesting to see how the proportional, integral and differential parts of the PID influence on the car behavior.
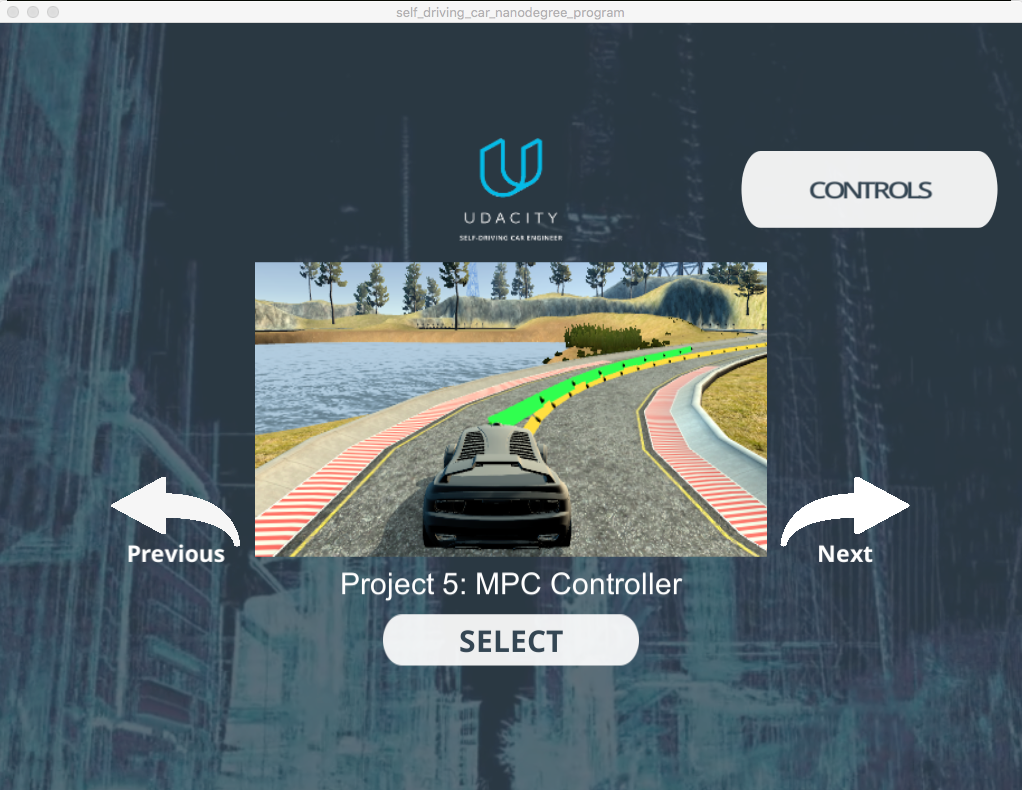
Project 5 - Model Prediction Control
In this project, we need to apply the cars kinematic model to predict the car trajectory and based on a set of waypoints sent to us by the simulator apply the Model Prediction Control to drive the car on the optimal trajectory. Model Prediction Control converts the control problem to an optimization problem with a set of objective functions, not just one. To solve this non-linear-optimization problem, the Ipopt package is suggested to be used. Here is a view of the simulator for this project:
As the PID project, the fun part is to see the car running. The final video of the car on the simulator is on my solution repo on the /videos directory. This is a small animated gif of that video:
Conclusions
It was a great term! I enjoyed every second of it. Looking forward to the final term where everything will come together, and the code will be driving Carla(Udacity’s real-physical car.) I can wait!