This is it! The Udacity’s Self-Driving Car Nanodegree is done after nine months.
For the last nine month, I have been staying late or waking up early in the morning to study. Finally, the term three is done, and I graduated from the nanodegree. This last term was more complicated than the rest, but it does close the loop of how a self-driving car system is organized.
Lessons and projects
The term could be organized into four sections. The first and last two sections are mandatory for graduation, but only one of the elective is required. As I was here for learning as much as possible: I did all of them.
Path planning
This part consists of four lessons and one path planning project. The lessons start by explaining algorithms to search the shorter path between two points on a map. Algorithms like A* and dynamic programming are explained. The second lecture explains different approaches to behavioral prediction and the difference between data and model-driven approaches. The third lecture is about behavioral planning using finite state machines and cost functions to plan what the car would do. This lecture contains a couple of slides showing the interactions between all the modules of a self-driving car. This is the time when the big picture of all the modules on a self-driving car is presented. Behavioral planning is the slower and top module, and the actuator module is the faster and lower module: it was fascinating. The final lecture shows different strategies for trajectory generation. For example, hybrid A* and polynomial trajectory generation. Usually, self-driving cars have more than one algorithms to generate trajectories based on the situation where the car is.
Project 1 - Path planning
In this project, we need to implement a path planning algorithms to drive a car on a highway on a simulator provided by Udacity. The simulator sends car telemetry information (car’s position and velocity) and sensor fusion information about the rest of the vehicles in the highway (Ex. car id, velocity, location). It expects a set of points spaced in time at 0.02 seconds representing the car’s trajectory. The communication between the simulator and the path planner is done using WebSocket. The path planner uses the uWebSockets WebSocket implementation to handle this communication. Here is how the car looks in the simulator.
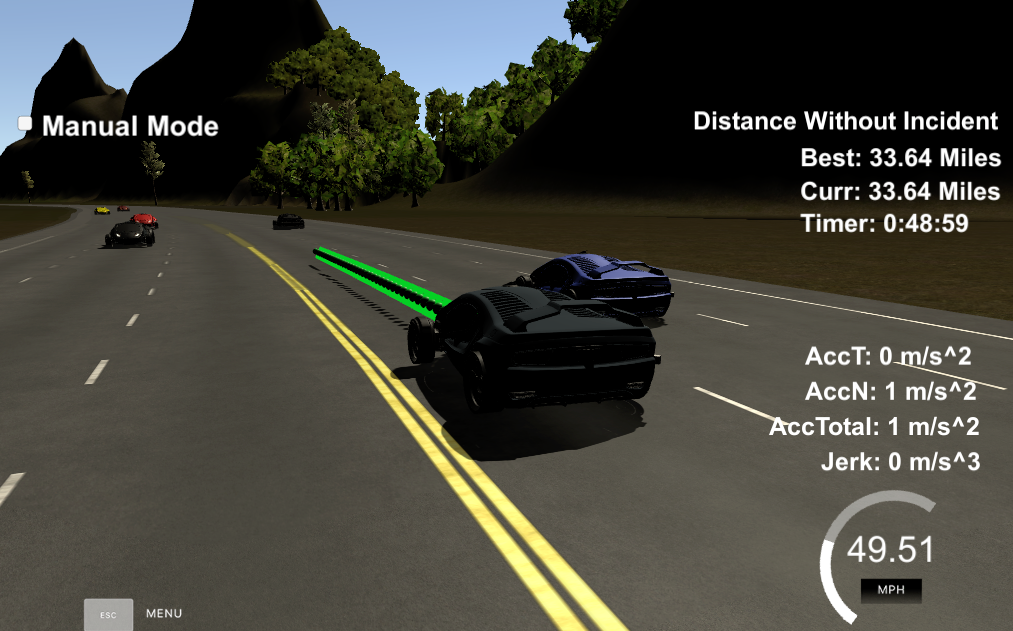
This project is implemented in C++. My solution could be found here.
Advanced deep learning
This section is one of the electives, but it is tough to opt out of it. It consists of four lessons and one project. Most of the lessons are dedicated to fully convolutional neural networks applied to semantic segmentation. Especially the article Fully Convolutional Networks for Semantic Segmentation is examined in details. Also, there is an excellent lecture about inference optimization with TensorFlow. Some of the explained techniques are fusion, quantization, and reduced precision. There is a lot to learn about how to run the neural network on inference after the training is done.
Project 2 - Semantic Segmentation
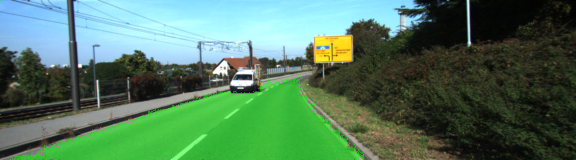
The object of this project is to label the pixels of a road image using the Fully Convolutional Network (FCN) described in the Fully Convolutional Networks for Semantic Segmentation by Jonathan Long, Even Shelhamer, and Trevor Darrel. More or less the idea is to reproduce the results obtained by the authors. Here is an image showing the result of the segmentation.
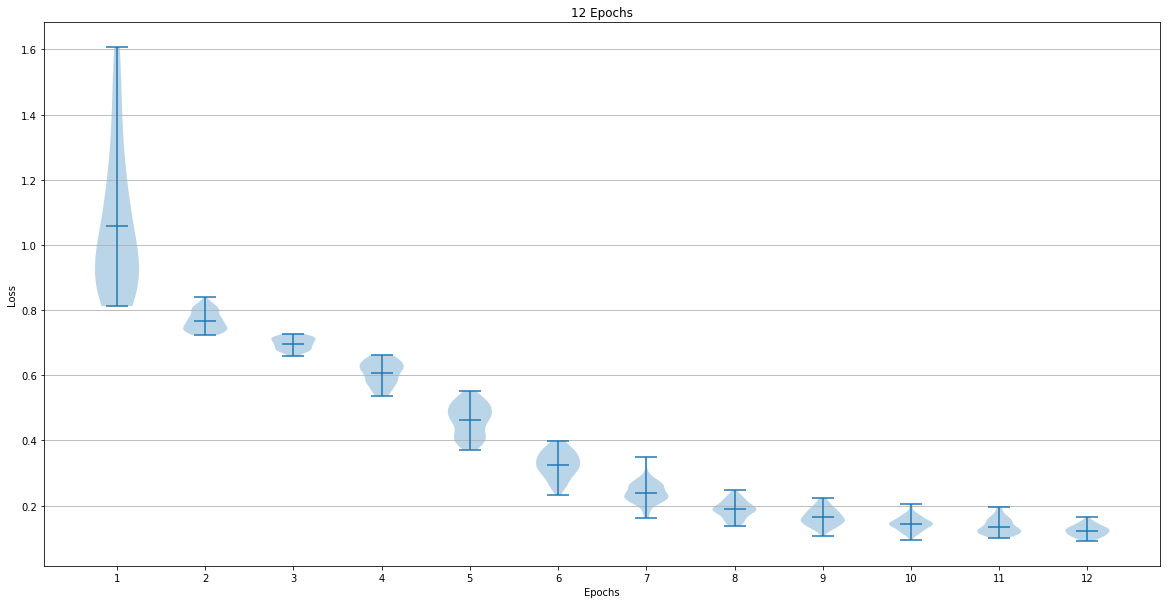
This was a very interesting project where the need for GPU is a most. I tried to use the GPU on my Mac, and the model could not fit into its memory. There is instruction on the materials on how to create an AWS EC2 Spot Instance to run the project without breaking your wallet. The following is another interesting image I got on the project. A violin plot to show the distribution of the network loss:
This project is written in Python with TensorFlow. Take a look at my solution repo. The repo has more pictures!
Functional safety
This section is one of the more complicated parts of the nanodegree. It is an introduction to Functional Safety. I think it was complicated because of the high level of details you need to take into account to understand functional safety under the ISO 26262 standard. Even when it is an elective, I would recommend any software professional to take. There are many aspects of software we never take into account on most common projects because the most common project could not injure a person or cause more tragic consequences. This section will cover the creation of the following documents: safety plan, hazard analysis and risk assessment, functional safety concept, technical safety concepts and software requirements. It was great, but I was happy when it was finished.
Project 3 - Functional Safety.
This project consists of creating the documentation for the functional safety of a Lane Assistance system under the umbrella of the Road vehicles - Functional safety: ISO 26262. ISO 26262 is an international standard for functional safety on an electrical or electronic system in production automobiles defined by the International Organization for Standardization (ISO). The Lane Assistance system is part of an Advanced Driver Assistance System(ADAS) with the following functionalities:
- Lane departure warning: When the driver drifts toward the edge of the lane, the steering wheel vibrates to alert the driver.
- Lane keeping assistance: When the driver drifts toward the edge of the lane, the steering wheel is turned toward the center of the lane to keep the car in its current lane.
The documents I created could be found here
Robot Operating System (ROS)
In this section, David Silver provides an overview of the autonomous vehicle architecture, and the last part of the term is an excellent introduction to Robot Operating System (ROS). It covers its command line interface, packages, catkin, and different types of nodes and service provided by ROS. Even when the installation is not explained, a virtual machine disk image is provided, and all the examples are hands-on. You will create some nodes async and sync interactions to be prepared to the final projects.
Project 4 - System integration project - Putting everything together
Let’s drive! This project consists of creating the set of nodes needed to control a self-driving car. The nodes are implemented in Python, but C++ is available as well. The modules are:
-
Waypoint updater: It receives the current position and produces a set of waypoints the car have to follow informing the velocity needed at each waypoint. Some waypoints need to have zero speed due to a red light, and this module should suggest the “stop trajectory.” The module receives all the possible waypoints one time at the beginning of the execution, and the waypoint where it needs to stop.
-
Drive-by-Wire (DBW): It is responsible for sending throttle, breaks and steering messages to the DBW logic to control the car. It is suggested to use a PID to execute the control and a low-pass filter to smooth the control actions.
-
Traffic Light Detection: This module receives the image from the camera and needs to detect the traffic sign shown to inform the Waypoint updater node where to stop the car.
Neither to say this project is tough. It is done on a team of up to five students. Each team has a team leader, and the project is sent to Udacity by him. It is not just that you are working with ROS, there are a few places where things could be wrong, and at least I got lost and frustrated multiple times. The solution was to go back and try with smaller steps. My part was to work on the DBW and Waypoint updater nodes. It was an opportunity to work on the control part that I think I won’t see too much after I finish the nanodegree. It was hard, but we got the project submitted, and it drove Carla, Udacity’s test self-driving car. Take a look at the following picture to see Carla in motion:
You can take a look at our team solution on Joe’s repo - our team lead(where all the fun happened) or on my fork here.
Conclusions
The last nine months were full of excitement, new ideas, new toys, and some long nights. The term three was vital to my understanding of the whole architecture of an autonomous vehicle. I know this is just the beginning and we could not even approach all the complexities of a self-driving car, but when I started a self-driving car was part of science fiction: now it is a near future reality. Thank you very much to Udacity for bringing this great courses to us. Keep it up!